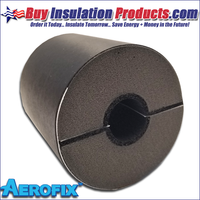
Installation Guide for Aeroflex Aerofix Insulated Pipe Supports
Posted by BIP - Aeroflex Installation Guide on 16th May 2024
Aeroflex Aerofix Installation Guide:
Aeroflex Aerofix insulated pipe supports are designed to maintain the vapor barrier and thermal performance of rubber pipe insulation systems at the points of support. Aeroflex Aerofix pipe supports consist of a polymeric rigid high density core that is lined with closed-cell EPDM foam rubber and encased with a zero-perm, weather-proof and corrosion-proof EPDM membrane. Aeroflex Aerofix pipe supports have a built-in self-seal ProTape closure to ensure seamless EPDM protection and fast and easy install.
STEP BY STEP INSTALL:
- Open the Aerofix fitting, remove both inside tape release
liners, wrap fitting around pipe, center at hanger
location and firmly press two halves together.
- Remove the release liner from Protape outer jacket and
apply with moderate pressure to achieve a strong bond.
- Position the Aerofix pipe support so the seam between the two halves
is horizontal to the legs of the pipe support system (strut channel / clevis hanger).
- Do not allow any gaps in the closure of the
insulation envelope.
- Seal the Aerofix to adjoining rubber insulation
tubes with rubber adhesive and press
together under compression to ensure vapor seal.
- If required to increase the length of the pipe support,
install 2 to 3 Aerofix pipe supports together, use rubber adhesive to bond them together, and wrap
each glued seam with Protape.
- Applying Protape over the glued seams on either side of the Aeroflex Aerofix is required for systems running below -20°F and recommend on all systems to maintain the vapor barrier.
- Slide metal pipe insulation shield under the Aerofix pipe support if required at the hanger point.


